Automatically add device frames and text to app screenshots
September 17, 2020
One of the more involved tasks when preparing an app for final release on Apple App Store, Google Play Store and others is to make, prepare and localize your app’s screenshots. Luckily there are tools available to automatically take screenshots and then frame them accordingly.
- Take a screenshots using the screenshots package from pub.
- Frame screenshots with frameit_chrome. After experimenting with frameit from fastlane I felt it was way too much pain to add good looking text with custom fonts (or bold text). It also did not support Emojis. The easiest way hence was to take screenshots with Chrome Headless 😅️.
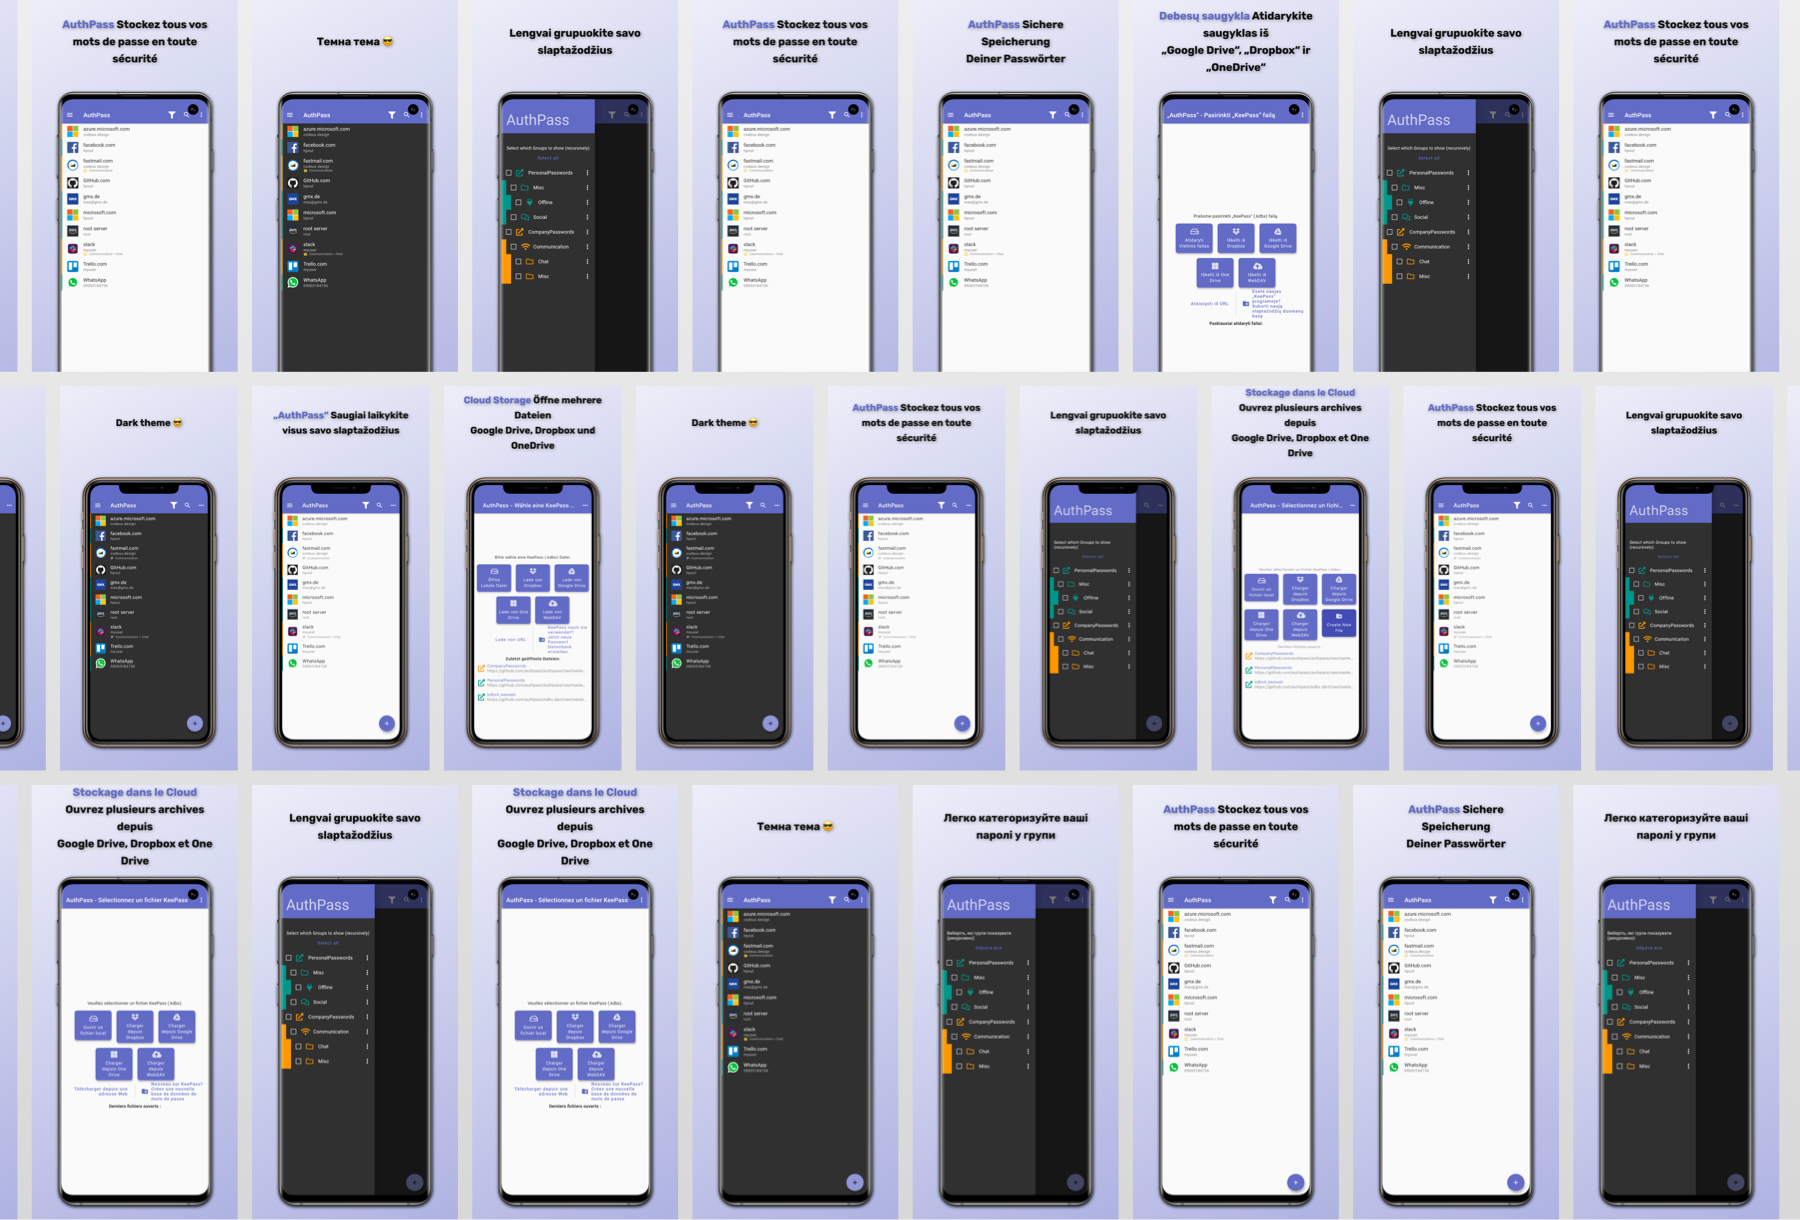
Framed images from AuthPass
Taking screenshots
The first step is to actually take the screenshots. For Flutter apps on Android and iOS apps you can use screenshots package.
To make the best of it create a screenshots.yaml as described in the documentation,
but make sure to include frame: false. Here is an example:
tests:
  # Note: flutter driver expects a pair of files eg, main1.dart and main1_test.dart
  - --target=test_driver/app.dart --driver=test_driver/screenshot_test.dart

# Interim location of screenshots from tests
staging: /var/tmp/screenshots

# A list of locales supported by the app
locales:
  - en-US
  - de-DE
  - lt-LT
  - ru-RU
  - uk-UA
  - fr-FR

# A map of devices to emulate
devices:
  ios:
    iPhone Xs Max:
  android:
    samsung-galaxy-s10-plus:

# Disabling framing, we do this with frameit_chrome later ;-)
frame: false
You also have to create the actual driver test which has to trigger the screenshots. Driver tests are documented on the flutter page about integration tests.
The only addition is to call the screenshots packages screenshot method as they describe in their documentation.
If you do not want to add screenshots package to your dependency, it is actually
quite easy to manually imement the screenshot method and put them into
the staging directory (e.g. /var/tmp/screenshots).
Checkout the screenshot_util.dart which
I have extracted from the screenshots package.
Now run screenshots and watch as it launches each simulator and generates screenshots.
  flutter pub global activate screenshots:main
  flutter pub global run screenshots:main
Framing screenshots and adding captions
Now to the fun part. After the taking screenshots your flutter project should look something like:
android/
    metadata/
      android/ # <-- `--base-dir` argument
        en-US/
          <device-name>-<screenshot-name>.png
          samsung-galaxy-s10-plus-password_generator.png # Example
          title.strings
          keyword.strings (optional)
        de-DE/
          <device-name>-<screenshot-name>.png
          samsung-galaxy-s10-plus-password_generator.png # Example
          title.strings
          keyword.strings (optional)
        frameit.yaml (optional)
      framed/ # <-- output directory
ios/
    metadata/
      en-US/
        ...
      de-DE/
        ...
The screenshots package will generate screenshots int android/metadata/android and ios/metadata.
To create framed versions of these screenshots we have to:
- Write nice captions. into
title.stringsand optionallykeyword.stringsinen-US. - Translate those captions into each locale subdirectory
- Optionally write a
frameit.yamlto customize frames.
So to start let’s write some captions into android/metadata/android/en-US/title.strings:
# title.strings
"appbar_menu" = "Example title 👍️";
And optionally a keyword.strings:
# keyword.strings
"appbar_menu" = "SWEAT";
frameit_chrome
frameit_chrome is a dart script which uses Chrome Headless to generate nice looking framed versions of your screenshots. Using Chrome has quite a few advantages:
- High quality font rendering.
- Font effects (colors, emoijs 🥳, etc).
- Simple additions of additional effects (gradient backgrounds, shadows, etc.) using CSS.
- Simple layout method using CSS.
Generating framed screenshots
We can simply use dart’s pub to install the frameit_chrome command:
$ pub global activate frameit_chrome
We also have to download the actual device frames. For this we use the facebook device frames which are bundled by fastlane in a nice handy repository at https://github.com/fastlane/frameit-frames.
cd $HOME
git clone https://github.com/fastlane/frameit-frames
Now we are ready to generate our outputs:
pub global run frameit_chrome --base-dir=/myproject/fastlane/metadata/android --frames-dir=$HOME/frameit-frames/latest
On non-mac platforms or when you’ve installed Google Chrome in non-default location:
pub global run frameit_chrome --base-dir=/myproject/fastlane/metadata/android --frames-dir=$HOME/frameit-frames/latest --chrome-binary="/Applications/Google Chrome.app/Contents/MacOS/Google Chrome"
The above command will create files in /myproject/fastlane/metadata/framed. For our above setup this might look like:
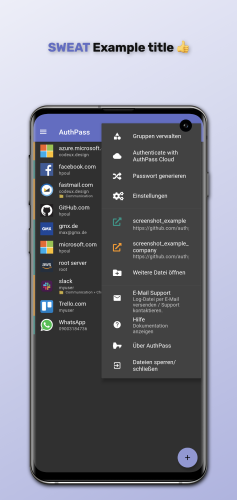
Example screenshot framed with Galaxy S10 Frame.
Multiple variants
Now if we want to publish our app into another app store which has other dimension requirements. For example the Samsung Galaxy Store which requires a 1:2 ratio 🤷♂️️ We can could just crop our screenshot.
This is done using a frameit.yaml configuration file in the your metadata
directory. So let’s create a fastlane/metadata/android/frameit.yaml:
# metadata/android/frameit.yaml

# Rewriting file name patterns.
rewrite:
  - pattern: 'samsung-galaxy-s10-plus'
    replace: 'samsungapps-samsung-galaxy-s10-plus'
    action: duplicate

# Customizing images.
images:
  samsungapps-samsung-galaxy-s10-plus:
    cropHeight: 2600
    device: 'samsung-galaxy-s10-plus'
First we define that all files which match the given pattern should be
duplicated. They will be prefixed with samsungapps.
Next we define a custom image processing for all images which start
with samsungapps-samsung-galaxy-s10-plus, by overwriting the device name
we want to use, and the height we want to crop.
The output is the exact same screenshot, frame but cropped at the given pixel height, ready to be submitted to the Samsung Galaxy Store.
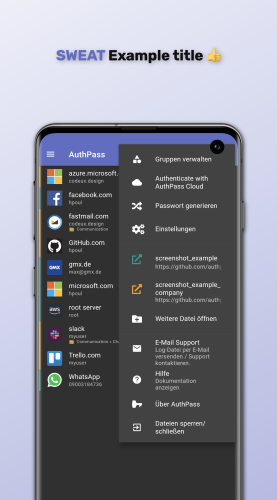
Framed with Galaxy S10, and cropped to 2600px
Customization
To further customize the look of your framed screenshots you can simply overload the CSS. This allows you to customize the background gradient, add/remove shadows, customize the fonts, etc.
Take a look at the used in index.html for css properties to overwrite.
For example to customize the background gradient modify frameit.yaml to add a css
property to your images configuration:
images:
  samsungapps-samsung-galaxy-s10-plus:
    cropHeight: 2600
    device: 'samsung-galaxy-s10-plus'
    previewLabel: 'Samsung App Store'
    css: |
      .scene {
        background: rgb(34,193,195);
        background: linear-gradient(0deg, rgba(34,193,195,1) 0%, rgba(253,187,45,1) 100%);
      }
      .frame-bg-shadow {
          filter: drop-shadow(25px 25px 15px blue);
      }
This results in some fancy crazy effects:
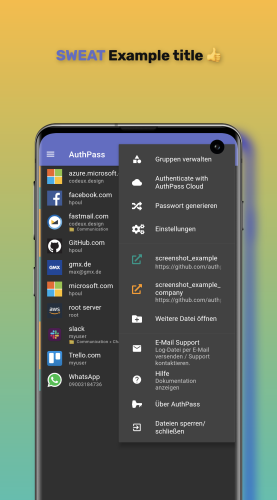
Custom gradient, with crazy colors 💪️
Hope you enjoyed this short introduction. Make sure to follow the frameit-chrome github project: https://github.com/authpass/frameit-chrome
For questions, comments, problems just post in the github issues.
